
why make this recipe
There’s something truly special about the combination of pumpkin and spices that appeals to many during the fall season. Simple Starbucks Pumpkin Scones are a delightful way to enjoy this favorite flavor in the comfort of your own home. With the right ingredients and a bit of care, these scones can bring the warmth of autumn right to your breakfast table or afternoon snack.
Whether you’re looking to impress guests or simply indulge yourself, these scones are an excellent choice. They’re soft, packed with pumpkin goodness, and drizzled with a sweet glaze that makes them irresistible. With each bite, you’ll taste the balance of spices that instantly reminds you of crisp leaves and cozy sweaters.
equipment needed for Simple Starbucks Pumpkin Scones
To make these scrumptious scones, you’ll need some basic kitchen tools. Gathering the right equipment will make your baking experience smooth and enjoyable.
A mixing bowl is essential for combining your dry and wet ingredients, while a whisk will help you achieve a smooth batter. You’ll also need a pastry cutter or your hands to work the cold butter into the flour.
Having a baking sheet lined with parchment paper will ensure the scones bake evenly without sticking. A cooling rack is also handy to allow your freshly baked scones to cool properly. Lastly, a sharp knife is necessary for cutting the dough into squares.
What You Need to Make Simple Starbucks Pumpkin Scones
- 2 1/4 cups all-purpose flour
- 1/3 cup packed brown sugar
- 2 tbsp white sugar
- 1 tsp ground cinnamon
- 1/4 tsp ground cloves
- 1/4 tsp ground ginger
- 1/4 tsp ground nutmeg
- 1 tsp baking soda
- 1/2 tsp baking powder
- 1/4 tsp salt
- 1/2 cup unsalted butter, cold and diced
- 1/2 cup chilled pumpkin puree
- 1/4 cup cold milk
- 1 cold egg
- 1 tsp vanilla extract
- 1 cup powdered sugar
- 2–3 tbsp heavy cream
- 1 tbsp powdered sugar
- 1/4 tsp pumpkin puree
- 1/4 tsp pumpkin pie spice
How to Cook Simple Starbucks Pumpkin Scones Step by Step
Start by preheating your oven to 400°F (200°C). Line a baking sheet with parchment paper or a silicone mat and set it aside for later. In a medium bowl, combine the chilled pumpkin puree, cold milk, cold egg, and vanilla extract. Whisk these ingredients together until they are smooth and well mixed. To maintain the texture, consider placing this wet mixture back in the fridge to keep it cold while handling the dry ingredients.
In a separate large bowl, toss together the all-purpose flour, packed brown sugar, white sugar, ground cinnamon, ground cloves, ground ginger, ground nutmeg, baking soda, baking powder, and salt. Stir these dry ingredients well, ensuring that everything is evenly distributed throughout the mixture. Next, add the cold, diced unsalted butter to your bowl. Using a pastry cutter or your hands, work the butter into the dry mixture until it resembles coarse crumbs. Keeping this butter cold is crucial, as it will help create flaky scones.
After that, make a well in the center of the combined dry ingredients and pour in the chilled pumpkin mixture from earlier. Gently mix using a rubber spatula until a soft dough forms. Be careful not to overmix, as this can toughen your scones. It’s alright if there’s still a little bit of flour visible. Once the dough has come together, transfer it to a lightly floured surface. Gently fold the dough over itself about 2-3 times with a pastry scraper, helping to include most of the flour in the process.
Shape the dough into an 8×5 inch rectangle, approximately 1 inch thick. Using a sharp knife, cut the dough into 6 squares. Place these squares on the prepared baking sheet, ensuring they have enough space to rise while baking. Now it’s time to bake the scones in your preheated oven. Allow them to bake for about 17–18 minutes, or until they are risen and lightly golden on the top. After baking, let the scones rest on the baking sheet for about 10 minutes. Then transfer them to a wire rack to cool completely. This cooling step is important, as it helps them hold their shape better before glazing.
While waiting for the scones to cool, you’ll want to prepare the glaze. In a medium bowl, whisk together the powdered sugar and 2 tablespoons of heavy cream until it reaches a smooth consistency. If you find that your glaze is too thick, you can slowly add up to 1/2 tablespoon more heavy cream; adjust until you achieve a spreadable texture. Take a moment to taste the glaze and confirm that it suits your sweet tooth.
Next, take 1 tablespoon of the vanilla glaze you just made and move it into a small bowl. Mix in 1 tablespoon of powdered sugar, 1/4 teaspoon of pumpkin puree, and 1/4 teaspoon of pumpkin pie spice. Stir well to combine all the ingredients. This spiced glaze will add a lovely accent on top of your scones. Place this mixture into a small ziplock bag, ready for piping onto the scones later.
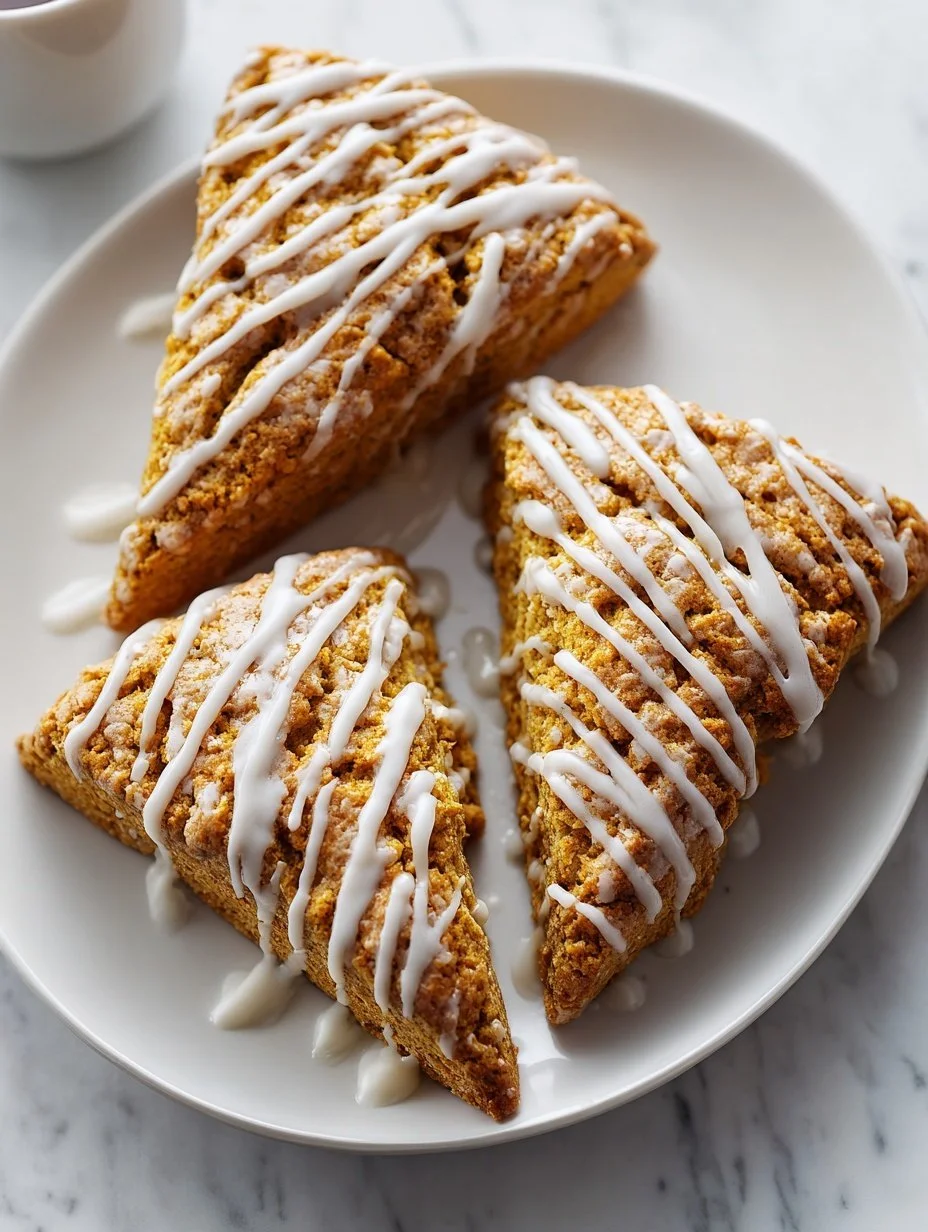
Once your scones have cooled completely, spread about 1.5–2 tablespoons of the vanilla glaze over each scone. Return them to the cooling rack. Let the glaze set for around 5–10 minutes to firm up. After that, snip the tip off the ziplock bag containing the spiced pumpkin glaze. Drizzle this glaze over the vanilla-glazed scones in appealing stripes. Allow the scones to sit for another 15–20 minutes so that the glazes can firm up before you dig in. This double-glazing not only enhances their visual appeal but also adds another layer of flavor.
how to make Simple Starbucks Pumpkin Scones
Making Simple Starbucks Pumpkin Scones is a step-by-step process that involves preparing both a wet and dry mixture, combining them, and then baking. The key to getting that perfect texture is in how you handle your ingredients, keeping things cold, especially the butter, and not overmixing your dough.
First, get all your ingredients and tools ready. This ensures an organized workflow and prevents any last-minute scrambling. Then, preheat your oven and prepare your baking sheet. Mixing the wet ingredients in one bowl and the dry ingredients in another is essential for properly integrating all flavors and textures without compromising the dough.
You’ll need to work quickly with the butter so it remains intact. Once the dough is formed by combining the two mixtures and you’ve cut out your scones, baking is straightforward! Keep an eye on them so that they rise beautifully without burning. Finally, finishing touches with the glazes will not only add flavor but also gorgeous visual appeal.
how to serve Simple Starbucks Pumpkin Scones
Serving Simple Starbucks Pumpkin Scones can be as simple or elaborate as you wish. The scones are delightful on their own, but you can elevate the experience by arranging them on a pretty platter. Pairing them with a hot cup of coffee or a warm chai tea can bring out their flavors beautifully.
These scones shine in the morning as a breakfast treat but can also serve as an afternoon snack. You can serve them fresh from the oven for breakfast or let them cool and enjoy them later in the day. Since they have a sweet glaze, they work well with something that balances it out, such as fresh fruit or a light yogurt dip.
what to serve with Simple Starbucks Pumpkin Scones
Complementing your scones with the right accompaniments can enhance the overall experience of enjoying them. A warm drink is a natural partner, so consider offering pumpkin spice latte, chai tea, or even a simple cup of coffee.
Fresh fruits like apple slices or pears can provide a crisp contrast to the sweetness of the scones. You might also want to include some whipped cream or clotted cream for added richness if you’re feeling indulgent. This not only adds flavor but makes your snack or breakfast more substantial.
If you wish to have a more complete spread, think about serving a variety of baked goods alongside the scones. Muffins or cookies can create a delightful autumn-themed array, perfect for gatherings or cozy mornings.
how to store Simple Starbucks Pumpkin Scones
Storing your Simple Starbucks Pumpkin Scones properly is crucial to keeping them fresh longer. To preserve their taste and texture, let them cool completely after baking. Then, store them in an airtight container at room temperature. They can stay fresh for about 2-3 days this way.
If you want to keep them for a longer time, consider freezing them. Place the cooled scones in a freezer-safe bag or container, separating layers with parchment paper to prevent sticking. You can keep them in the freezer for up to a month. To enjoy, simply thaw them at room temperature or warm them in the oven for a few minutes.
tips to make Simple Starbucks Pumpkin Scones
For the best outcome while making Simple Starbucks Pumpkin Scones, keep a few tips in mind. Using cold ingredients is essential, particularly the butter and the liquid components. This helps create that desirable flaky texture that makes scones special.
Don’t be tempted to overmix the dough. A few gentle folds are enough to combine everything without working the gluten too much, which can lead to dense scones. When cutting the scones, use a sharp knife to make clean cuts rather than a dull one, which can smash the dough.
Feel free to adjust spices according to your taste preferences. More cinnamon or nutmeg can elevate the flavors if you’re a fan. Lastly, tasting the glaze before using it can help you get it just right!
variation (if any)
There are several ways to personalize Simple Starbucks Pumpkin Scones to match your taste. One delightful variation is to add chocolate chips or nuts for added texture. Chopped pecans or walnuts can add a nice crunch.
You could also switch up the spices according to what you prefer. If you want a more intense pumpkin flavor, consider increasing the pumpkin puree slightly but be careful not to make it too wet. For those who enjoy citrus, adding the zest of an orange or lemon can provide a refreshing twist.
If you prefer a different glaze, you can top the scones with a cream cheese glaze, which pairs wonderfully with pumpkin. Simply replace the vanilla glaze with a mixture of cream cheese, powdered sugar, and a little milk for a rich frosting.
best time to make Simple Starbucks Pumpkin Scones
Simple Starbucks Pumpkin Scones are best made during the fall season when pumpkin is in high demand and everyone is craving warm spices. The cozy flavors of cinnamon, nutmeg, and pumpkin create a seasonal treat that resonates well during cool mornings.
That said, these scones can be made year-round, especially if you’re a devoted pumpkin lover. Whether it’s a crisp October morning or a summer afternoon, the comforting taste and aroma of these scones can brighten any day.
common mistakes to avoid
While making scones can be straightforward, a few common mistakes can lead to less-than-perfect results. One major pitfall is not keeping the ingredients cold, particularly the butter. Room temperature butter can result in dense scones rather than the fluffy texture you aim to achieve.
Another mistake is overmixing the dough. For soft, tender scones, it’s important to mix just until the ingredients are combined. Additionally, improper measuring of flour can lead to dry or wet dough, so make sure to either spoon the flour into your measuring cup or use a kitchen scale for accuracy.
Neglecting to cut the scones properly can also hinder their rise during baking. Make sure to use a sharp knife to avoid squashing the dough. Lastly, be mindful to let the scones cool before glazing; this helps in achieving a better texture as well.
nutritional notes
Enjoying food is about balance. While scones are a treat mostly due to their carbohydrate and sugar content, they do provide energy for your day.
The pumpkin puree adds fiber, while the spices contribute antioxidants that can enhance overall health. If you’re looking for a healthier version, consider substituting some of the all-purpose flour with whole wheat flour or using a sugar replacement. Remember to enjoy them in moderation as part of a varied diet.
FAQs
Q: Can I use homemade pumpkin puree instead of canned?
A: Yes, homemade pumpkin puree can be used in this recipe. Just make sure to properly drain it to avoid excess moisture.
Q: How can I make these scones ahead of time?
A: You can prepare the dough in advance, then refrigerate it until you are ready to bake. Alternatively, baked scones can be stored and reheated later.
Q: What if my dough seems too dry?
A: If your dough is dry, you can add a little extra milk, a tablespoon at a time, until it comes together nicely.
conclusion
Simple Starbucks Pumpkin Scones are a fantastic way to embrace the flavors of autumn. The process of making these scones can bring warmth and joy into your kitchen, creating a cozy atmosphere perfect for enjoying with loved ones.
With just a few key ingredients and some straightforward steps, you can recreate this delightful treat at home. Whether enjoyed fresh out of the oven or shared with friends, these scones are sure to become a seasonal favorite. Happy baking!