
why make this recipe
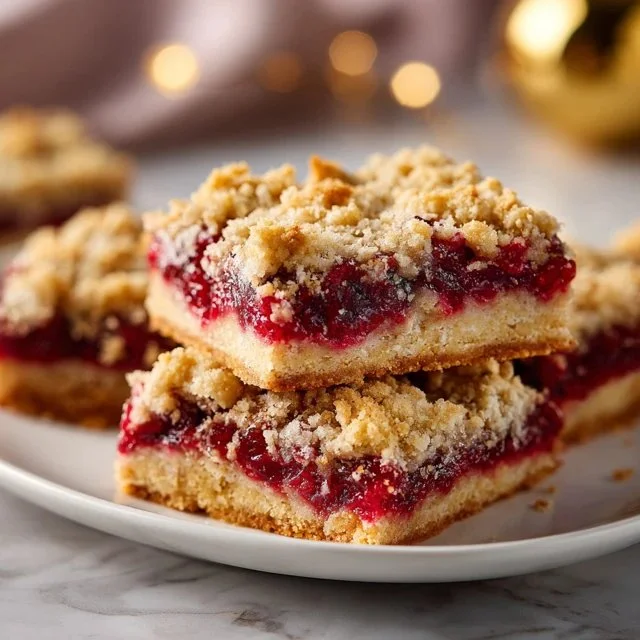
Christmas Cherry Bars are a delightful treat perfect for the holiday season. With their vibrant red cherry filling and a soft, buttery crust, these bars bring festive joy to your dessert table. They are easy to make, require minimal ingredients, and are sure to impress family and friends.
Not only do they taste amazing, but they also look beautiful when dusted with powdered sugar. These bars can be made ahead of time, allowing you to focus on your holiday festivities. It’s a sweet way to celebrate the season!
equipment needed for Christmas Cherry Bars
To successfully make Christmas Cherry Bars, you will need a few essential kitchen tools. A 9×13-inch baking pan is crucial for holding the batter and cherry filling. Parchment paper or nonstick spray will help prevent sticking.
A large mixing bowl is necessary for creaming your butter and sugar together. Make sure you also have measuring cups and spoons for precise ingredient amounts. Finally, a spatula or wooden spoon will help you mix everything smoothly.
What You Need to Make Christmas Cherry Bars
1 cup (2 sticks) unsalted butter, softened
1 1/2 cups granulated sugar
1/2 teaspoon salt
4 large eggs
1 teaspoon pure vanilla extract
1/4 teaspoon almond extract (optional)
2 1/2 cups all-purpose flour
2 cans (21 oz each) cherry pie filling
Powdered sugar, for dusting
How to Cook Christmas Cherry Bars Step by Step
To start, preheat your oven to 350 degrees F (175 degrees C). Prepare your 9×13-inch baking pan by lining it with parchment paper or spraying it with nonstick spray. This will help ensure that your cherry bars come out cleanly and do not stick to the pan.
In a large mixing bowl, cream the softened butter and granulated sugar together until the mixture is light and fluffy. This usually takes about 3 to 5 minutes. Next, add the eggs one at a time, making sure to mix well after each addition. This step is key as it helps to incorporate air into the batter, making it light.
Once the eggs are blended in, stir in the vanilla extract and almond extract if you are using it. This will add a lovely aroma and flavor to your cherry bars. After that, gradually add the flour and salt, mixing until the batter is smooth. It’s important not to overmix, as this can result in tough bars.
Now it’s time to put the mixture into your prepared pan. Spread about 2/3 of the batter into the bottom of the pan evenly. Make sure to cover the entire area, creating a nice base for the cherry filling. After you’ve done that, open the cans of cherry pie filling and spoon it over the batter, spreading the filling gently to cover the surface.
Once the cherry filling is in place, drop spoonfuls of the remaining batter over the filling. It doesn’t have to be perfect; some cherry filling should peek through. This will create a beautiful marbled effect once baked. Place the pan in the preheated oven and bake for about 38 to 42 minutes. The bars are ready when the top is golden brown and a toothpick inserted comes out clean.
After taking the pan out of the oven, allow it to cool completely in the pan. For the best results, you can place it in the refrigerator for about an hour, which allows for cleaner cuts. Before serving, dust the top with powdered sugar for an extra festive touch.
how to make Christmas Cherry Bars
Making Christmas Cherry Bars is a joyful experience that brings the warmth of the holidays into your kitchen. To start, make sure you have all your ingredients measured and ready. This will make the process smoother and more enjoyable.
Begin by creaming together the butter and sugar. It’s important to beat them until the mixture is light, as this ensures a fluffy texture in your bars. When adding the eggs, focus on mixing well after each addition. The eggs play a significant role in binding the ingredients together and adding richness.
Once your wet ingredients are mixed, gradually incorporate the flour and salt, ensuring there are no lumps. When combining everything, keep an eye on the texture. You want a smooth batter that’s easy to spread.
As you prepare your batter, don’t rush. Take the time to spread the base evenly in the pan. Layering the cherry filling properly will make a huge difference in the final presentation. The spoonfuls of batter dropped on top should not overwhelm the cherries. Allow the filling to shine through, creating a beautiful contrast.
Baking is where the magic happens. Sitting in a warm oven, the bars rise and develop a lovely golden color. Keep an eye on the time and start checking for doneness closer to the end of the baking period.
how to serve Christmas Cherry Bars
Serving Christmas Cherry Bars is simple. Once they have cooled and set, cut them into squares for easy portioning. Place them on a festive platter or in individual dessert cups for a charming presentation.
You can enhance the look by adding a light dusting of powdered sugar on top right before serving. This little touch adds a crisp white snowy effect, making them perfect for the holiday theme.
Consider serving your bars alongside a scoop of vanilla ice cream or a dollop of whipped cream for those who enjoy a creamier accompaniment. The combination of flavors complements the tartness of the cherries beautifully.
what to serve with Christmas Cherry Bars
When it comes to enjoying Christmas Cherry Bars, you can expand the dessert table with complementary items. A classic holiday treat like gingerbread cookies pairs delightfully, bringing warmth and spice to the mix.
You might also consider serving a spiced hot chocolate or eggnog alongside the bars. This will create a festive atmosphere and keep your guests feeling cozy.
For a bit of freshness, a fruit salad can balance the sweetness of the desserts. A mix of seasonal fruits like pomegranates, oranges, and apples adds color and a refreshing crunch that contrasts well with the cherry bars.
how to store Christmas Cherry Bars
Storing your Christmas Cherry Bars is quite straightforward, which is great for busy holiday schedules. Once they have completely cooled, you can keep them in an airtight container. This will help maintain their freshness.
If you plan to enjoy them over several days, the best place for storage is in the refrigerator. The colder temperature helps to keep them firm and delicious. Make sure to separate layers with wax paper to prevent sticking.
For longer storage, you can freeze your cherry bars. Cut them into squares, wrap each piece in plastic wrap, then place them in a freezer-safe container. They can last in the freezer for up to three months. When you’re ready to eat them, simply thaw them in the refrigerator overnight.
tips to make Christmas Cherry Bars
To ensure your Christmas Cherry Bars turn out perfectly every time, there are a few handy tips to keep in mind. First, ensure your butter is softened before starting. This helps to create a smooth batter that incorporates air for fluffiness.
Don’t skip the refrigeration step after baking. Cooling the bars completely will help you make clean cuts. If you cut them too soon, they may crumble or become messy.
When adding the cherry filling, be gentle to avoid breaking up the cherries. A gentle touch maintains their shape and enhances the visual appeal of the bars. Don’t worry if everything doesn’t look perfect; it’s the taste that counts!
variation (if any)
There are multiple ways to vary the Christmas Cherry Bars to suit different tastes. For instance, you can swap the cherry pie filling for another fruit filling such as blueberry, raspberry, or even pumpkin for a unique twist.
Adding nuts to the batter is another delicious variation. Chopped walnuts or pecans add a lovely crunch, complementing the soft texture of the bars. Additionally, a sprinkle of cinnamon or nutmeg in the batter can bring warm flavors perfect for the holiday season.
If you’re looking to lower the sugar content, you can use a sugar substitute designed for baking. Always ensure to read the packaging for advice on measurements, as they can differ.
best time to make Christmas Cherry Bars
Christmas Cherry Bars are ideal for making ahead of time, which is a great advantage during the busy holiday season. They can be prepared a day or two before your celebrations, allowing you to save time when guests arrive.
Making these bars during the first week of December can allow you to enjoy them throughout the holidays. They also make wonderful gifts when packaged nicely. Sharing homemade treats is always a cherished gesture that adds to the holiday spirit.
common mistakes to avoid
To create the best Christmas Cherry Bars, watch out for some common pitfalls. One frequent mistake is overmixing the batter, which can lead to dense, tough bars. Mix just until the ingredients are combined.
Another mistake is not greasing the pan properly. Using parchment paper is a reliable way to avoid stuck bars, but if you’re not using it, ensure the pan is well-greased.
Finally, be cautious with the baking time. Every oven is different; using a toothpick to check for doneness is a good habit. You want the top to be golden brown, but also cooked through without being overdone.
nutritional notes (optional)
Christmas Cherry Bars can be a tasty treat, but they are also rich in calories due to the butter and sugar. Each serving contains a good amount of carbohydrates and sugars, mainly from the granulated sugar and cherries.
For those watching their diet, consider cutting smaller portions. If you decide to switch out ingredients for healthier alternatives, such as using whole wheat flour instead of all-purpose flour, you can increase the nutritional value slightly while maintaining flavor.
FAQs
Can I use fresh cherries instead of pie filling?
Yes, you can use fresh cherries, but you’ll need to cook them down with sugar and a bit of cornstarch to create a filling consistency.
Can I make these cherry bars gluten-free?
Absolutely! You can substitute all-purpose flour with a gluten-free flour blend. Just ensure the blend contains a binding agent, such as xanthan gum.
How long do these cherry bars last?
When stored properly, Christmas Cherry Bars can last in the refrigerator for about a week and can be frozen for up to three months.
conclusion
Christmas Cherry Bars are a delightful addition to your holiday celebrations. Their combination of buttery crust and sweet cherry filling makes for an irresistible treat that everyone will love.
With their ease of preparation and ability to be made ahead, these bars fit perfectly into the busy holiday season. Don’t hesitate to try different variations or add your personal touches to make them uniquely yours. This festive dessert is sure to become a family favorite for years to come!