
Why Make This Recipe
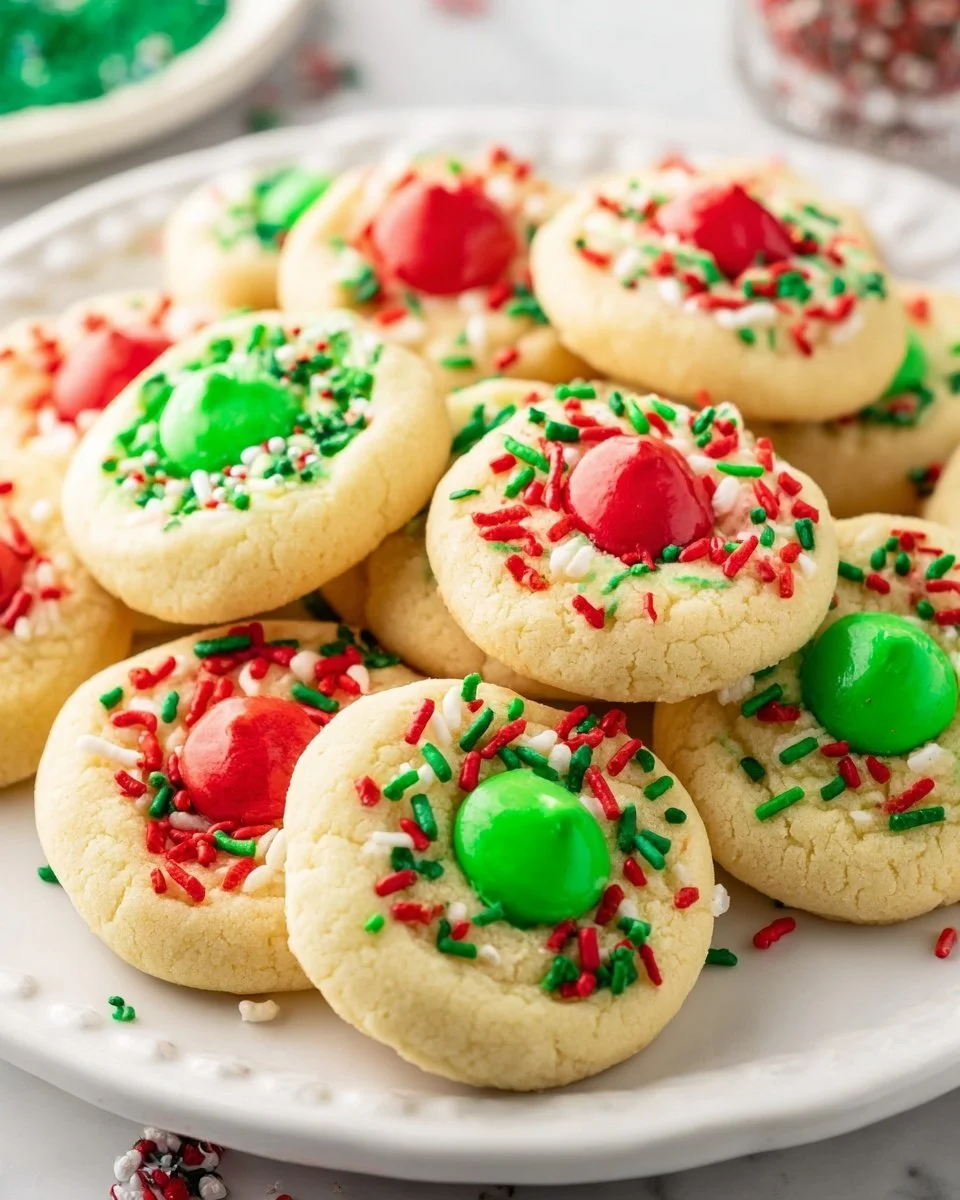
Christmas Thumbprint Cookies are a delightful treat that adds a festive touch to any holiday gathering. They are not only easy to make but also charming to look at and deliciously sweet. When you take a bite, the buttery cookie combined with the tart filling bursts with flavor.
Making these cookies is a wonderful way to create memories in the kitchen. Whether you are baking alone or with friends and family, it provides an opportunity for fun and creativity, especially when it comes to decorating. Plus, the rich history and tradition behind thumbprint cookies make them a beloved holiday staple.
Equipment Needed for Christmas Thumbprint Cookies
Before diving into the baking process, it’s essential to gather all the necessary equipment. Having the right tools makes the experience smoother and more enjoyable. Here’s what you will need:
- Mixing bowls
- Electric mixer or whisk
- Measuring cups and spoons
- Baking sheets
- Parchment paper
- Cookie scoop or spoon
- Cooling rack
- Small saucepan
- Spatula
What You Need to Make Christmas Thumbprint Cookies
Gathering the ingredients for Christmas Thumbprint Cookies is simple and straightforward. Here’s a list of everything you will need:
1 cup butter (softened)
1/2 cup light brown sugar (packed)
1 egg (room temperature)
1 teaspoon vanilla extract
2 cups all-purpose flour
1/4 teaspoon salt
Colored sprinkles
1 cup sugar
1/4 cup butter (cubed)
1/4 cup evaporated milk
8 ounces white candy coating
1 teaspoon vanilla extract
Red and green food coloring (paste or gel)
How to Cook Christmas Thumbprint Cookies Step by Step
To create delightful Christmas Thumbprint Cookies, it’s important to follow each step carefully while keeping the holiday spirit in mind. Start by preheating your oven to 350°F (175°C). Prepare your baking sheets by lining them with parchment paper to ensure an easy release after baking.
In a mixing bowl, combine the softened butter and light brown sugar, mixing them together until they become light and fluffy. This process usually takes about two to three minutes if using an electric mixer. Once fluffy, add the egg and a teaspoon of vanilla extract to the mixture, continuing to mix until everything is well combined and smooth.
Next, in another bowl, whisk together the all-purpose flour and salt. Gradually add this flour mixture to the butter and sugar mixture, mixing just until the flour is fully incorporated. Be careful not to overmix, as this could lead to tough cookies.
Once the dough comes together, use a cookie scoop or spoon to portion out equal amounts of dough. Roll each portion into a ball, about one inch in diameter. Place them onto the prepared baking sheets, leaving a few inches of space between each ball to allow for spreading during baking.
Press your thumb or the back of a spoon gently into the center of each ball to create a small indentation. This is where your filling will go, so make sure it’s deep enough but not all the way through.
Now, bake the cookies in your preheated oven for about 10 to 12 minutes. They should just be starting to turn golden around the edges. Once baked, remove them from the oven and allow them to cool on the baking sheets for a few minutes before transferring them to a cooling rack.
While your cookies cool, you can prepare the filling. In a small saucepan over medium heat, combine the cubed butter, sugar, evaporated milk, and vanilla extract. Stir continuously until the mixture starts to come to a boil. Once boiling, allow it to simmer for about two minutes, ensuring you stir it often to prevent burning.
Remove the saucepan from heat and let it cool slightly. Once it has cooled, stir in the food coloring to create your desired holiday shades of red and green. If you want a marbled effect, you can add both colors at once and gently swirl them together.
Once your cookies have cooled completely, fill each thumbprint with the colored filling. Feel free to decorate the tops with colored sprinkles for a fun and festive touch.
How to Serve Christmas Thumbprint Cookies
Christmas Thumbprint Cookies can be served in various ways, making them versatile for any gathering. For a festive presentation, arrange them on a decorative platter garnished with holly or seasonal greens. This will give a charming appeal and invite guests to indulge.
You can also package these cookies in decorative boxes or tins. Adding a personal touch by including a holiday card or some festive ribbon can make this a lovely gift for family and friends.
During holiday parties, serving these cookies alongside a warm cup of hot chocolate or spiced cider can make for a delightful treat. Their sweet, buttery flavor pairs beautifully with festive beverages, creating a cozy atmosphere.
What to Serve with Christmas Thumbprint Cookies
When planning a holiday gathering, it helps to think about what might complement your Christmas Thumbprint Cookies. Here are some wonderful serving suggestions:
- Hot chocolate with marshmallows
- Eggnog or spiced cider
- Coffee or cappuccino
- A selection of other holiday cookies for a dessert spread
- Fresh fruit, like berries or sliced citrus, for a refreshing contrast
These accompaniments can elevate your cookie experience, transforming it into a delightful holiday feast that guests will remember fondly.
How to Store Christmas Thumbprint Cookies
Once you have baked and decorated your Christmas Thumbprint Cookies, you may want to know how to best store them. To keep these cookies fresh, store them in an airtight container at room temperature. They should stay good for about one week.
If you plan to make the cookies ahead of time, you can freeze them for longer storage. Place the cookies in a single layer in a freezer-safe container, separating layers with parchment paper. This way, they won’t stick together. They can last in the freezer for up to three months.
When you’re ready to enjoy them, simply allow the cookies to thaw at room temperature for a few hours. If you have any leftover filling, store it in the fridge in a separate container and use it within a few days as you serve the cookies.
Tips to Make Christmas Thumbprint Cookies
Making the perfect batch of Christmas Thumbprint Cookies can be made easier with some handy tips. First, be sure to use room-temperature ingredients; it helps them blend more easily. This is especially important for butter and eggs.
When making the indentations, don’t worry if they don’t hold their shape perfectly right away. After baking, the cookies may puff up a bit, and the indents can lose their definition. You can gently press them back down as soon as they come out of the oven, while they are still warm.
Try to use high-quality butter for a rich flavor. Substituting margarine or low-fat alternatives can affect the texture and taste of the cookies. For a more festive look, you can also experiment with different fillings, including fruit preserves or even chocolate ganache.
Variation
Christmas Thumbprint Cookies are highly customizable. While the classic version features a butter base and sweet filling, feel free to mix things up! Consider trying almond extract instead of vanilla for a different twist. This can add a delightful flavor that pairs wonderfully with the sweetness of the filling.
You can also use various types of food coloring to create fun themes that fit with your holiday decor. Alternatively, try using flavored candy coatings, such as peppermint or raspberry, which can change the entire character of the cookie.
If you want an even healthier option, consider using whole wheat flour in place of all-purpose flour. This way, you can enjoy a more nutritious cookie without sacrificing taste.
Best Time to Make Christmas Thumbprint Cookies
The ideal time to make Christmas Thumbprint Cookies would be during the weeks leading up to the holiday season. This is when many people are in a festive mood and looking to share treats with friends and family.
Baking during this time allows you to fill your home with the warm, inviting aromas of freshly baked cookies. You can also incorporate this recipe into your holiday traditions, making a batch each year to enjoy and share.
Considering they store well, you can bake them a week or two before the holidays. This timing allows you to share them at various celebrations, potlucks, and holiday gatherings.
Common Mistakes to Avoid
Creating delightful Christmas Thumbprint Cookies can be simple, but there are a few common mistakes to steer clear of. One frequent error is overmixing the dough. A gentle hand is key when combining the wet and dry ingredients to keep the cookies tender.
Another mistake happens during baking; if the cookies are left in the oven too long, they can quickly become hard and dry. Follow the recommended baking time closely and keep an eye on them.
Finally, when making the indentations, be cautious not to press too hard. The thumbprint should be deep enough for the filling but should retain the shape of the cookie. With a few careful adjustments, you can bake the perfect batch every time.
Nutritional Notes
While indulging in sweet treats during the holiday season is common, it’s essential to be mindful of nutrition. Each Christmas Thumbprint Cookie offers a delightful combination of flavors and ingredients.
Keep in mind that ingredients like butter and sugar contribute to the overall calorie count. If you’re looking for a lighter option, consider reducing the sugar in the cookies or providing smaller portions.
Remember, moderation is key! Enjoy these treats as part of a balanced diet, and feel free to share them as gifts or at gatherings for a special holiday touch.
FAQs
What kind of filling can I use for thumbprint cookies?
Thumbprint cookies are versatile, and you can use various fillings such as fruit preserves, nut butter, chocolate, or even caramel.
Can I freeze thumbprint cookies?
Yes, Christmas Thumbprint Cookies can be frozen! Place them in an airtight container or freezer bag separated by parchment paper for easy thawing later.
How long do Christmas Thumbprint Cookies last?
When stored properly in an airtight container at room temperature, these cookies can last about a week. If frozen, they can last for up to three months.
Conclusion
Christmas Thumbprint Cookies are a festive favorite that brings joy to any holiday celebration. With their easy preparation, delicious taste, and cute appearance, they are sure to be a hit among family and friends. Gather your ingredients, and get ready to create a batch of these delightful cookies that will warm hearts and create lasting memories during this special time of year. Happy baking!

Christmas Thumbprint Cookies
Ingredients
Method
- Preheat your oven to 350°F (175°C) and line your baking sheets with parchment paper.
- In a mixing bowl, beat the softened butter and light brown sugar until light and fluffy for about 2-3 minutes.
- Add the egg and teaspoon of vanilla extract, mixing until fully combined.
- In another bowl, whisk together the all-purpose flour and salt, then gradually add this mixture to the butter mixture, combining gently.
- Roll the dough into balls, about one inch in diameter, and place them on the baking sheets with space in between.
- Make a small indentation in the center of each ball using your thumb or a spoon.
- Bake the cookies for 10 to 12 minutes, just until the edges start to turn golden.
- Allow to cool on the baking sheets for a few minutes before transferring to a cooling rack.
- In a small saucepan over medium heat, combine cubed butter, sugar, evaporated milk, and vanilla extract.
- Stir continuously until boiling, then let it simmer for 2 minutes.
- Remove from heat and stir in food coloring to achieve desired colors.
- Once cookies are cooled, fill each indentation with the colored filling.
- Optionally decorate with colored sprinkles.